
To evaluate the Print Quality Diagnostic Page
This section includes the following topics:
•
Ink Levels
•
Good color bars
•
Ragged, irregularly streaked, or faded bars
•
Regular white streaks in the bars
•
Bar colors are not uniform
•
Large Black Font Text
•
Alignment Patterns
•
If you see no defects
Printhead maintenance
129
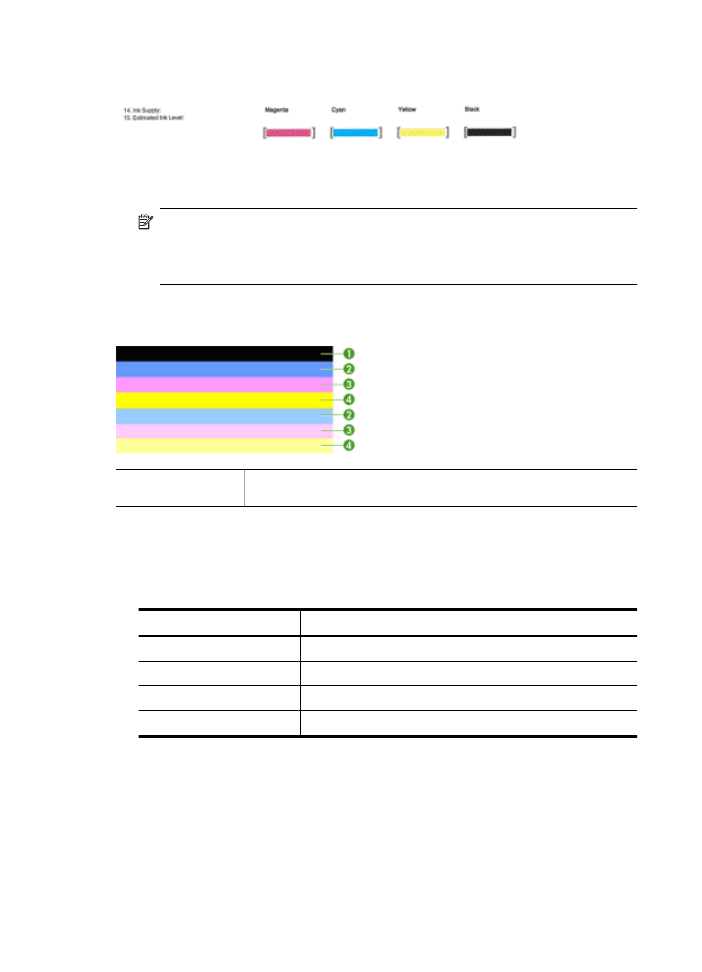
Ink Levels
▲ Look at the Ink Level indicators. If any of the bar level indicators are low, you may
need to replace that ink cartridge.
NOTE: Ink level warnings and indicators provide estimates for planning
purposes only. When you receive an ink alert message, consider having a
replacement cartridge available to avoid possible printing delays. You do not
need to replace cartridges until print quality becomes unacceptable.
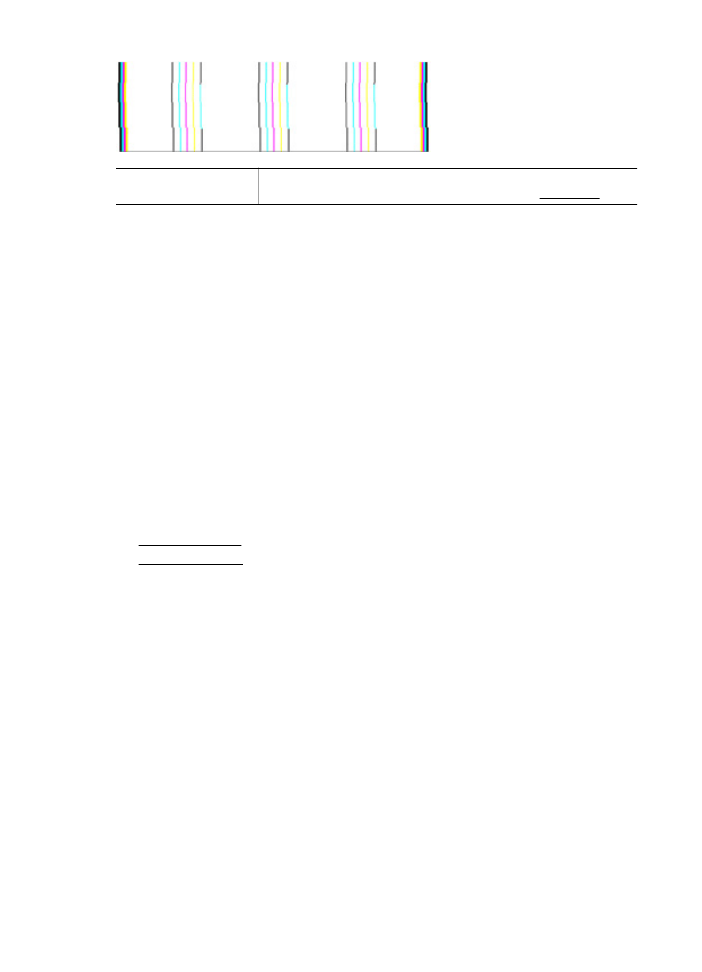
Good color bars
Example of Good
Color Bars
All seven bars are solid, sharp-edged, and extend with uniform color all
the way across the page - the printer is operating correctly.
▲ Look at the color bars in the middle of the page. There should be seven color bars.
The color bars should have sharp edges. They should be solid (not streaked with
white or other colors). They should be uniform in color throughout.
The bars correspond to the ink cartridges in the printer as follows:
Item
Cartridge color
1
Black Ink Cartridge
2
Cyan Ink Cartridge
3
Magenta Ink Cartridge
4
Yellow Ink Cartridge
Chapter 8
130
Solve a problem
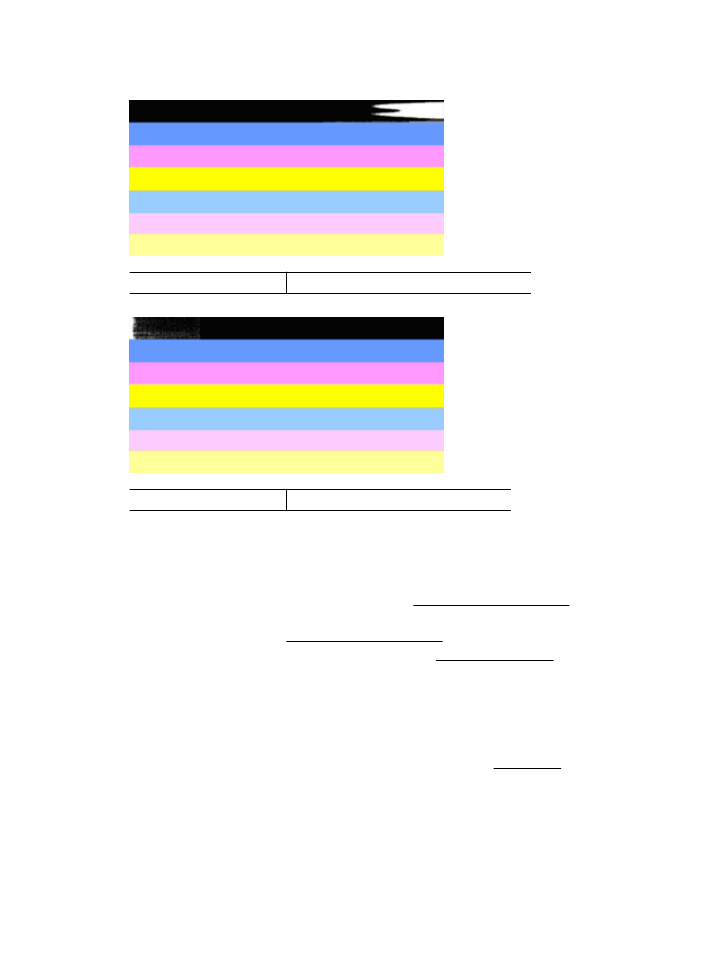
Ragged, irregularly streaked, or faded bars
Example of Bad Color Bars The top bar is irregularly streaked or fading.
Example of Bad Color Bars The top black bar is ragged on one end.
If any of the bars are ragged, irregularly streaked, or faded, follow these steps:
1. Make sure the ink cartridges have ink.
2. Remove the cartridge corresponding to the streaked bar and make sure it is
correctly vented. For more information, see Replace the ink cartridges.
3. Reinstall the cartridge and make sure all the cartridges are correctly latched. For
more information, see Replace the ink cartridges.
4. Clean the printhead. For more information, see Clean the printhead.
5. Try another print or reprint the Print Quality Diagnostic report. If the problem still
occurs, but cleaning seems to have helped, clean again.
6. If cleaning does not solve the problem, replace the cartridge that corresponds to
the ragged bar.
7. If replacing the ink cartridge does not help, contact HP - the printer may need to be
serviced. For more information about contacting HP, see HP support.
Preventing the problem that causes ragged bars on the Print Quality Diagnostic
report:
•
Avoid leaving opened ink cartridges outside of the printer for an extended period of
time.
•
Wait until a new cartridge is ready to be installed before removing an old ink
cartridge.
Printhead maintenance
131
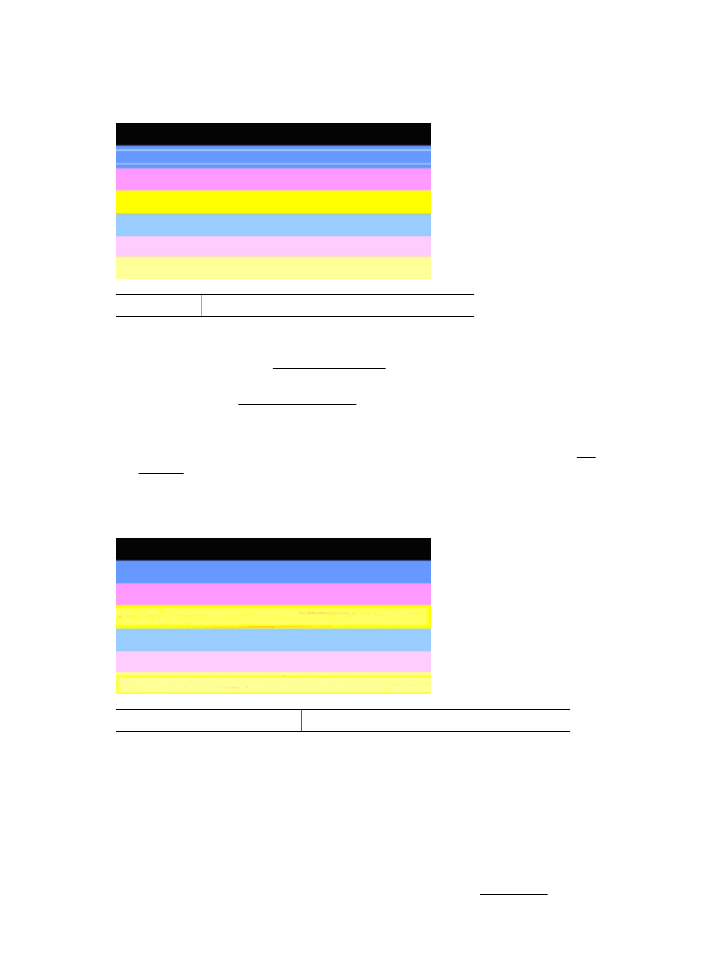
Regular white streaks in the bars
If any of the color bars show regular white streaks, follow these steps:
White streaks The print quality bars have white streaks in them.
1. If the Print Quality Diagnostic report reads PHA TTOE = 0, align the printer. For
more information, see Align the printhead.
2. "If PHA TTOE is not 0," or aligning does not help, clean the printhead. For more
information, see Clean the printhead.
3. Print another Print Quality Diagnostic report. If the streaking is still there, but seems
better, try another cleaning. If the streaking gets worse, contact HP - the printer
may need to be serviced. For more information about contacting HP, see HP
support.
Bar colors are not uniform
Print quality bars are not uniform The bars have lighter or darker portions in them.
If the color of any of the bars is not uniform, follow these steps:
1. If the printer was recently transported at a high altitude, try a printhead cleaning.
2. If the printer was not recently transported, try printing another Print Quality
Diagnostic report. This uses less ink than a printhead cleaning, but if it is not
effective, try a cleaning.
3. Retry the Print Quality Diagnostic report. If the colors seem to be improving,
continue cleaning. If the colors get worse, contact HP - the printer may need to be
serviced. For more information about contacting HP, see HP support.
Chapter 8
132
Solve a problem
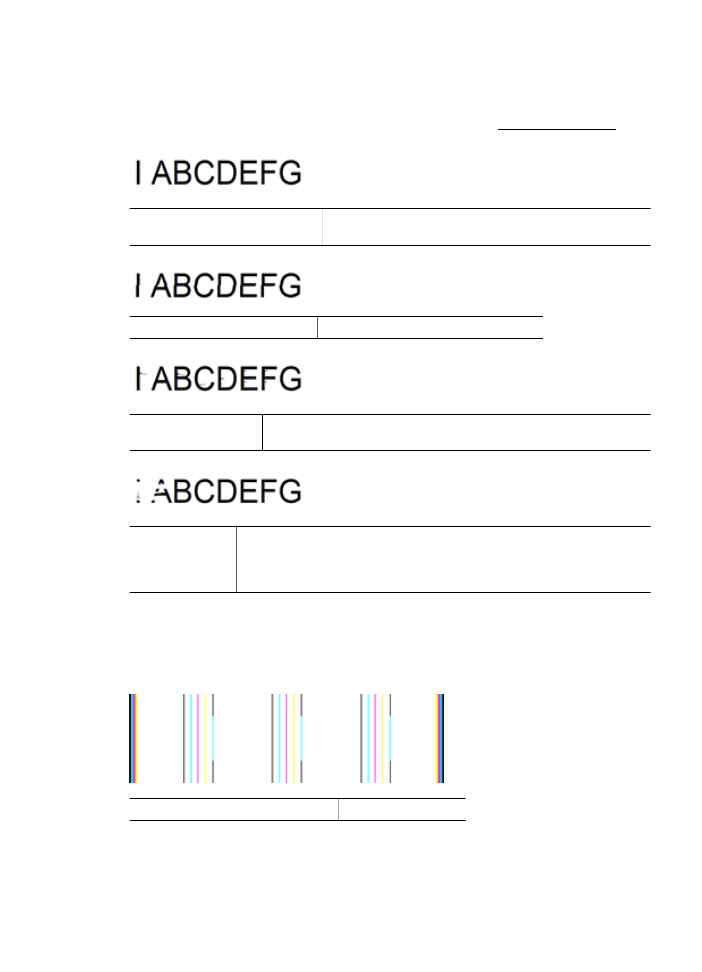
Large Black Font Text
Look at the large-font text above the color blocks. I ABCDEFG The type should be
sharp and clear. If the type is jagged, try aligning the printer. If there are streaks or
smears of ink, clean the printhead. For more information, see Clean the printhead.
Example of good Large-Font
Type
The letters are sharp and clear - the printer is operating
correctly.
Example of bad Large-Font Type The letters are jagged - align the printer.
Example of bad
Large-Font Type
The letters are smeared - clean the printhead and check if the paper is
curled. To avoid curl, store all paper flat in a resealable bag.
Example of bad
Large-Font Type
The letters are ragged on one end - clean the printhead. If this defect
occurs right after a new black cartridge is installed, the printer's automatic
servicing routines may solve the problem in a day or so, using less ink than
a printhead cleaning.
Alignment Patterns
If the color bars and large font text look OK, and the ink cartridges are not empty, look
at the alignment pattern directly above the color bars.
Example of a good alignment pattern The lines are straight.
Printhead maintenance
133
Examples of a bad
alignment pattern
The lines are jagged - align the printer. If that does not work, contact
HP. For more information about contacting HP, see HP support.
If you see no defects
If you do not see any defects on the print quality report, then the printing system is
working correctly. There is no reason to replace supplies or have the printer serviced,
because they are functioning correctly. If you still have a print quality problem, here are
some other things you can check:
•
Check the paper.
•
Check the print settings.
•
Make sure your image has sufficient resolution.
•
If the problem seems confined to a band near the edge of your printout, use the HP
software or another software application to rotate the image 180 degrees. The
problem might not appear on the other end of the print.