
Replace the ink cartridges
NOTE: For information on recycling used ink supplies, see HP inkjet supplies
recycling program.
If you do not already have replacement ink cartridges for the printer, see HP supplies
and accessories.
Chapter 7
74
Work with ink cartridges
NOTE: At this time, some portions of the HP Web site are available in English
only.
NOTE: Not all cartridges are available in all countries/regions.
CAUTION: Wait until you have a new ink cartridge available before removing the
old ink cartridge. Do not leave the ink cartridge outside of the printer for an
extended period of time. This can result in damage to both the printer and the ink
cartridge.
Use these steps to replace the ink cartridges.
To replace the ink cartridges
1. Make sure the printer is turned on.
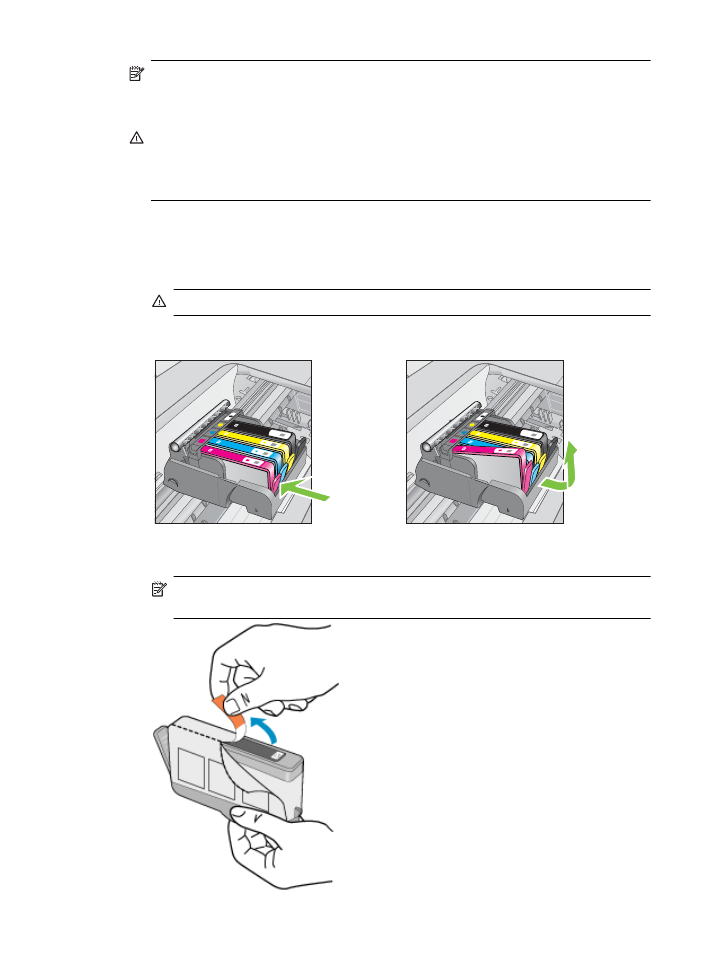
2. Open the ink cartridge access door.
WARNING! Wait until the print carriage stops moving before proceeding.
3. Press the tab on the front of the ink cartridge to release it, and then remove it from
the slot.
4. Remove the new ink cartridge from its packaging by pulling the orange pull-tab
straight back to remove the plastic wrap from the ink cartridge.
NOTE: Make sure you remove the orange pull-tab completely and the label is
slightly torn before you remove the orange cap in the next step, or ink can leak.
Replace the ink cartridges
75
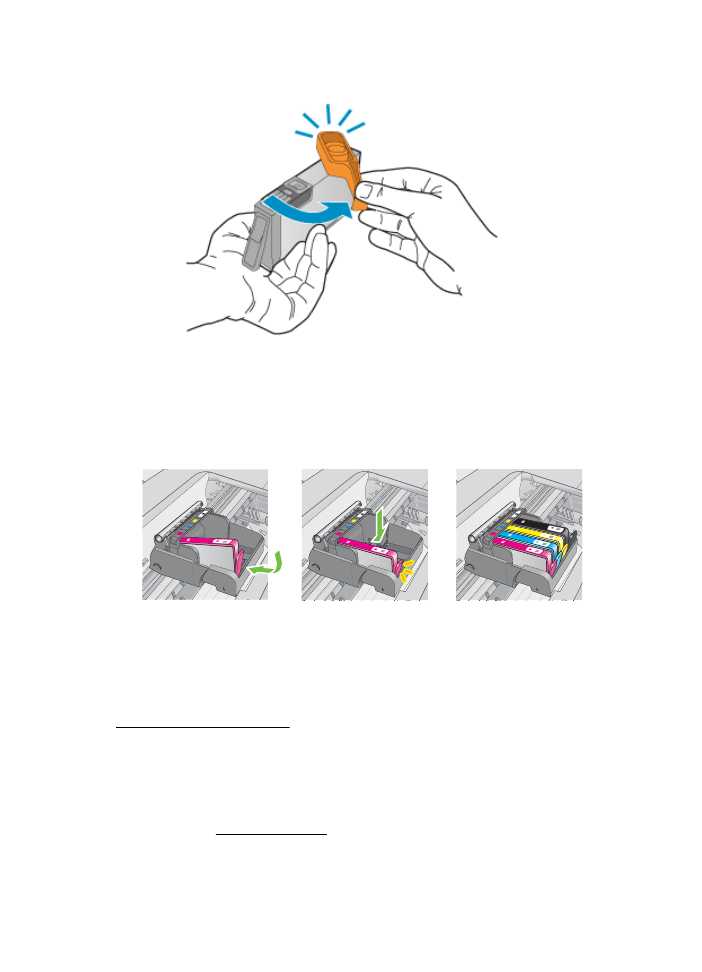
5. Twist the orange cap to snap it off.
6. Using the colored shaped icons for help, slide the ink cartridge into the empty slot
until it clicks into place and is seated firmly in the slot.
Make sure that you insert the ink cartridge into the slot that has the same shaped
icon and color as the one you are installing.
7. Repeat steps 3 through 6 for each ink cartridge you are replacing.
8. Close the ink cartridge access door.
Related topics
HP supplies and accessories